![CAD Forum - tips, tricks, discussion and utilities for AutoCAD, Inventor, Revit and other Autodesk products [www.cadforum.cz]](../common/arkance_186.png "CAD Forum - tips, tricks, discussion and utilities for AutoCAD, Inventor, Revit and other Autodesk products [www.cadforum.cz]")

 CAD tip # 8903:
Question
Download the Normals.vlx from  Download, load it with APPLOAD and start the NORMALS command. Now select all 3DFaces to analyze (you may want to EXPLODE your 3D mesh object first, e.g. objects from 3DPLOT). You can choose to draw Normals or to recolor the individual Faces.
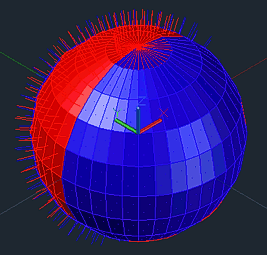
The Normals option draws vectors going from the face center "outwards", from its "front" side. Any normals going away from you indicate a backface (reversed). The normals are created in the layer "Normals", they have the same length (1/20 of the current viewport size) and they are either red or blue. Red normals go towards the current view direction (camera), the blue ones face away. Please note that the colors depend on the current view direction. Rerun the command if you change the view rotation.
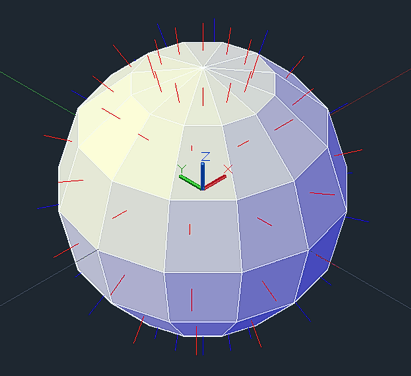
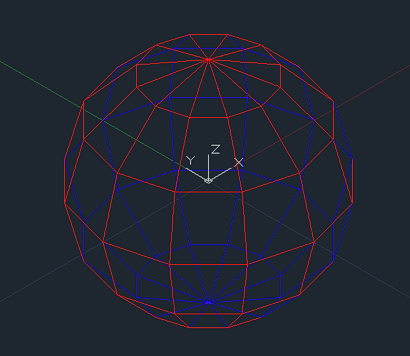
Missing "fur" (going inwards) and blue areas indicate a backface problem in this sphere model from 3DPLOT (both options of the NORMALS command were used):
You can easily flip face normals using the FlipFace utility - see the Tip 9063.

